
Phone: +86 15398058207
E-mail: sales@blisspak.com
Add: Room 603 Building C, The Huixin Center, Zhangba One Road, Yanta Zone, Xi'an City, Shaanxi Province, China
How to Make Your Own Blister Packaging?
How to Make Your Own Blister Packaging?
Blister packaging is everywhere - holding toothbrushes at the drugstore, protecting electronics on retail shelves, organizing medical devices in sterile trays, and displaying toys, hardware, and cosmetics. Its combination of product visibility, physical protection, and tamper evidence makes it one of the most versatile packaging formats in the world. But how exactly is blister packaging made? And more importantly - should you make it yourself, or partner with a specialist?
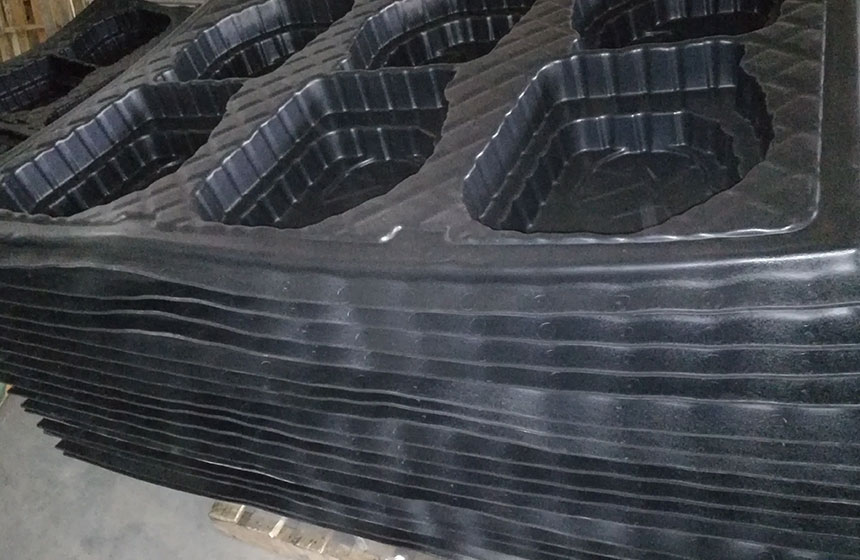
In this article, we walk through the complete blister manufacturing process, reveal the hidden complexities that most DIY attempts miss, and show why working with an experienced manufacturer like BlissPak is faster, cheaper, and more reliable than going it alone.
The Blister Packaging Manufacturing Process: Step by Step
Step 1: Product Analysis and Concept Design
Every blister package begins with the product. The first question is: What are we protecting, and how will it be sold? A toothbrush needs a different blister than a USB drive, a set of drill bits, or a sterile medical device.
At this stage, engineers measure the product's exact dimensions, weight, and fragility, then determine the optimal blister format:
- Face seal blister (single-sided, heat-sealed to a paperboard card)
- Clamshell (hinged two-piece, folds over the product)
- Two-piece blister (separate front and back shells, often sonically welded)
- Slide blister (product slides into a formed sleeve)
- Blister tray / insert (used inside a box for product positioning and protection)
The design also accounts for retail requirements - hang holes, visibility windows, printed card graphics, and tamper-evident features.
Step 2: Material Selection
Choosing the right plastic sheet is critical, and it is where many DIY attempts fail. Different materials offer different properties:
| Material | Key Properties | Typical Use |
|---|---|---|
| PETG | Excellent clarity, impact resistance, food-safe, easy to form | Retail blisters, medical, electronics |
| APET | High clarity, recyclable, good rigidity | Consumer goods, food packaging |
| PVC | Low cost, easy to form, good clarity | Hardware, toys, stationery |
| PP | Heat resistance, food-safe, chemical resistance | Microwave-safe, food containers |
| PS (HIPS) | Rigid, low cost, easy to print | Inserts, trays, disposable packaging |
| Anti-static PETG | Static dissipation | Electronic components, circuit boards |
Material thickness typically ranges from 0.25 mm to 1.5 mm, selected based on product weight, required rigidity, and cost targets. At BlissPak, we help clients balance performance and cost - often recommending a thinner gauge with strategic ribbing rather than over-engineering the entire sheet.
Step 3: Mold Making (Tooling)
The mold defines the shape of every blister, and its quality directly determines the quality of the final part. Three types of molds are common:
- Prototype / plaster molds: Low cost, fast turnaround (2–3 days), suitable for 50–500 piece sample runs. Limited detail and durability.
- Cast aluminum molds: The industry standard for production. Excellent detail, consistent cooling, and a lifespan of 100,000+ cycles.
- CNC-machined aluminum molds: For high-volume, precision-critical parts with tight tolerances and complex geometries.
Mold making requires CNC machining, pattern making, and vacuum channel design - skills that take years to master. A poorly designed mold will produce thin spots, webbing, or incomplete forming, leading to high scrap rates.
Step 4: Sheet Heating and Thermoforming
This is the core of blister manufacturing. The plastic sheet is clamped in a frame and heated to its glass-transition temperature (typically 130–180°C, depending on material). Once soft and pliable, the sheet is lowered over the mold, and vacuum is applied from beneath, pulling the sheet tightly into every cavity and detail.
For deep-draw parts (tall blisters), plug-assist forming is used - a plug gently pre-stretches the sheet before vacuum forming, ensuring more uniform wall thickness. Without plug assist, the corners of a deep blister can become paper-thin and fragile.
Cycle times range from 15 to 45 seconds per sheet, depending on material thickness, cavity depth, and mold size.
Step 5: Trimming and Die Cutting
After forming, the blisters are still connected in a sheet. They must be cut into individual units. This is done using:
- Steel rule dies for standard shapes and lower volumes
- Class A machined dies for precision cuts and high-volume production
- 5-axis CNC trimming for complex 3D geometries where a flat die cannot reach
Trimming quality matters - rough edges can cut consumers, jam in packaging lines, or look unprofessional on a retail shelf.
Step 6: Quality Inspection
Every production run requires inspection. Key checks include:
- Dimensional accuracy (cavity fit, overall dimensions)
- Wall thickness uniformity (ultrasonic measurement)
- Visual defects (bubbles, pinholes, flow marks, burns, webbing)
- Clarity and surface finish
- Seal strength (for face seal blisters)
- Fit and function with the product and paperboard card
At BlissPak, we perform First Article Inspection (FAI), in-process sampling, and 100% final inspection for cosmetic defects on critical runs.
Step 7: Assembly, Packaging, and Delivery
Many blister packages require additional assembly:
- Heat-sealing the blister to a printed paperboard card
- Inserting the product (if requested)
- Folding and tucking clamshells
- Packing into master cartons with proper interleaving to prevent scuffing
Should You Really Make Your Own Blister Packaging?
Now that you have seen the full process, the question becomes: Is DIY blister packaging practical?
For a one-off prototype or a school project, a small vacuum former and a handmade mold can produce a rough sample. But for production quantities - even as few as 500 pieces - the challenges mount quickly:
- Equipment cost: A production-grade thermoforming machine costs $30,000–$200,000+, plus trim presses, mold-making equipment, and quality inspection tools.
- Tooling expertise: Designing a mold that produces consistent, defect-free parts requires experience. Most first-time molds need 2–3 revisions.
- Material waste: Inexperienced operators often see scrap rates of 20–40%, compared to 2–5% at a professional factory.
- Time: Learning the process, building molds, and troubleshooting can take weeks or months.
- Consistency: Retail and medical customers demand batch-to-batch consistency that is nearly impossible to achieve without dedicated equipment and process control.
In short: making blister packaging is a manufacturing business in itself. Most companies are better off focusing on their own product and brand, and outsourcing the packaging to a specialist.
Why Choose BlissPak for Your Blister Packaging?
BlissPak is a specialized vacuum forming and blister packaging manufacturer with years of experience serving clients worldwide. Here is what we bring to every project:
One-Stop Capability
From design and DFM (Design for Manufacturability) review to mold making, forming, trimming, printing, heat-sealing, and final assembly - we handle every step in-house. No need to coordinate multiple vendors.
Material Expertise
We work with all major thermoformable materials - PETG, APET, PVC, PP, HIPS, anti-static, and recycled grades - and we provide full material certificates and traceability. Whether you need FDA food-contact compliance, RoHS/REACH compliance, or ESD protection for electronics, we have you covered.
Fast Prototyping
We deliver prototype samples in 3–7 business days using rapid tooling, so you can test fit, function, and retail presentation before committing to production molds.
Precision and Quality
Our CNC-machined aluminum molds, in-process quality control, and final inspection ensure that every blister fits your product perfectly and looks premium on the shelf. Typical tolerances: ±0.3 mm on critical dimensions.
Scalable Production
We support runs from 500 prototype pieces to 500,000+ production units, with the flexibility to scale up as your demand grows.
Global Delivery
We ship worldwide with carefully managed packaging and logistics, and we can accommodate FOB, CIF, or DDP Incoterms.
Ready to Get Started?
Making blister packaging is a complex, precision-driven process - but it does not have to be your problem. Whether you need a single prototype to validate a new product, or a high-volume production run for retail launch, BlissPak has the expertise, equipment, and dedication to deliver blister packaging that protects your product, elevates your brand, and fits your budget.
Contact BlissPak today for a free DFM review and quotation. Send us your product dimensions or a sample, and we will show you exactly how your blister packaging should be made.
- BlissPak: Precision Blister Packaging, Perfected.
- Disposable sushi tray with lid wholesale
- Custom Disposable Plastic Cups with Logo
- Is blister packaging cheap?
- How to Make Your Own Blister Packaging?
- Advantages of Wine Vacuum Trays
- Custom Packaging Solutions for Precious Metal
- Why choose BlissPak for vacuum forming services?
- What Are The Five Modern Packaging Materials
- Why Bamboo Food Containers Are Better Than Plastic
- The Benefits of Bamboo Fiber Material Food Packaging